About Us

Joined by our passion for meat, beer, cards and meat, we created a compitition bbq team to partake in just that.

Saturday, June 26, 2010

Fatty Piston - BBQ "Tool"

The "Fatty" or Bacon Explosion is now a common term known in the BBQ world and beyond. This "tool" should make it easier for you to successfully make a fatty.

I found this tool on another blog here but there were no specific instructions or bill of materials on how to build it. I'm making it easier.....

Why else would someone make this tool? Well.... I have issues - whenever I make a burrito / taco I seem to add about twice as much as the tortilla will hold - now what do I do? How am I supposed to eat this monster? Well, I have the same problem when I make a fatty. I know how much stuff I want on the inside. It just seems to be a little overstuffed making the fatty hard to roll up and maintain the integrity of bacon weave. When I saw the fatty piston on the other site a light bulb went on. I can compact the stuffing, getting the required amount of product in the middle!

All of the items were purchased at Lowe's but should be available at any home improvement store.


2" Schedule 40 PVC Pipe - the Cylinder
3/4" Schedule 40 PVC Pipe - the Piston Drive Shaft
1" Slip Fit Cap - the Piston Head
1" Slip Fit x 3/4" Slip Fit Adapter - connects the drive shaft with the piston head
1 1/2" Slip Fit Cap - the handle
1 1/2" Slip Fit x 3/4" Slip Fit Adapter - connects the drive shaft with handle.

I made the handle a bit larger than the piston head so you can tell which side is the piston and the larger surface just felt better in my hand.


You can see that the 1" Cap barely fits inside the 2" pipe. It's not a super tight tolerance with about 1/16" clearance on each side. I was worried at first that this gap would allow product to get around the side and cause problems but it worked great!


Here are the parts laid out so you can visualize how they go together.


I used some goo gone to get rid of the bar code sticker and price tag.


Here is the piston assembled. I glued the handle and slip fit adapter with PVC cement. I did not glue the piston head and adapter because PVC Glue is probably not food grade and I didn't feel like testing the theory even though it probably wouldn't come in contact - since the piston stayed together when I used it - I guess it didn't need to be cemented anyway. I may have to glue it after a few hundred uses but until I need to.....

I cut the 2" Pipe / product cylinder about 12" long. Most of the fatties I make seem to come out about 8 - 9" wide so this left a little room just in case but wasn't so long it became difficult to use / clean / store. I cut the 3/4" pipe 15" Long. Combined with the piston head and handle, it was long enough but still not too long.


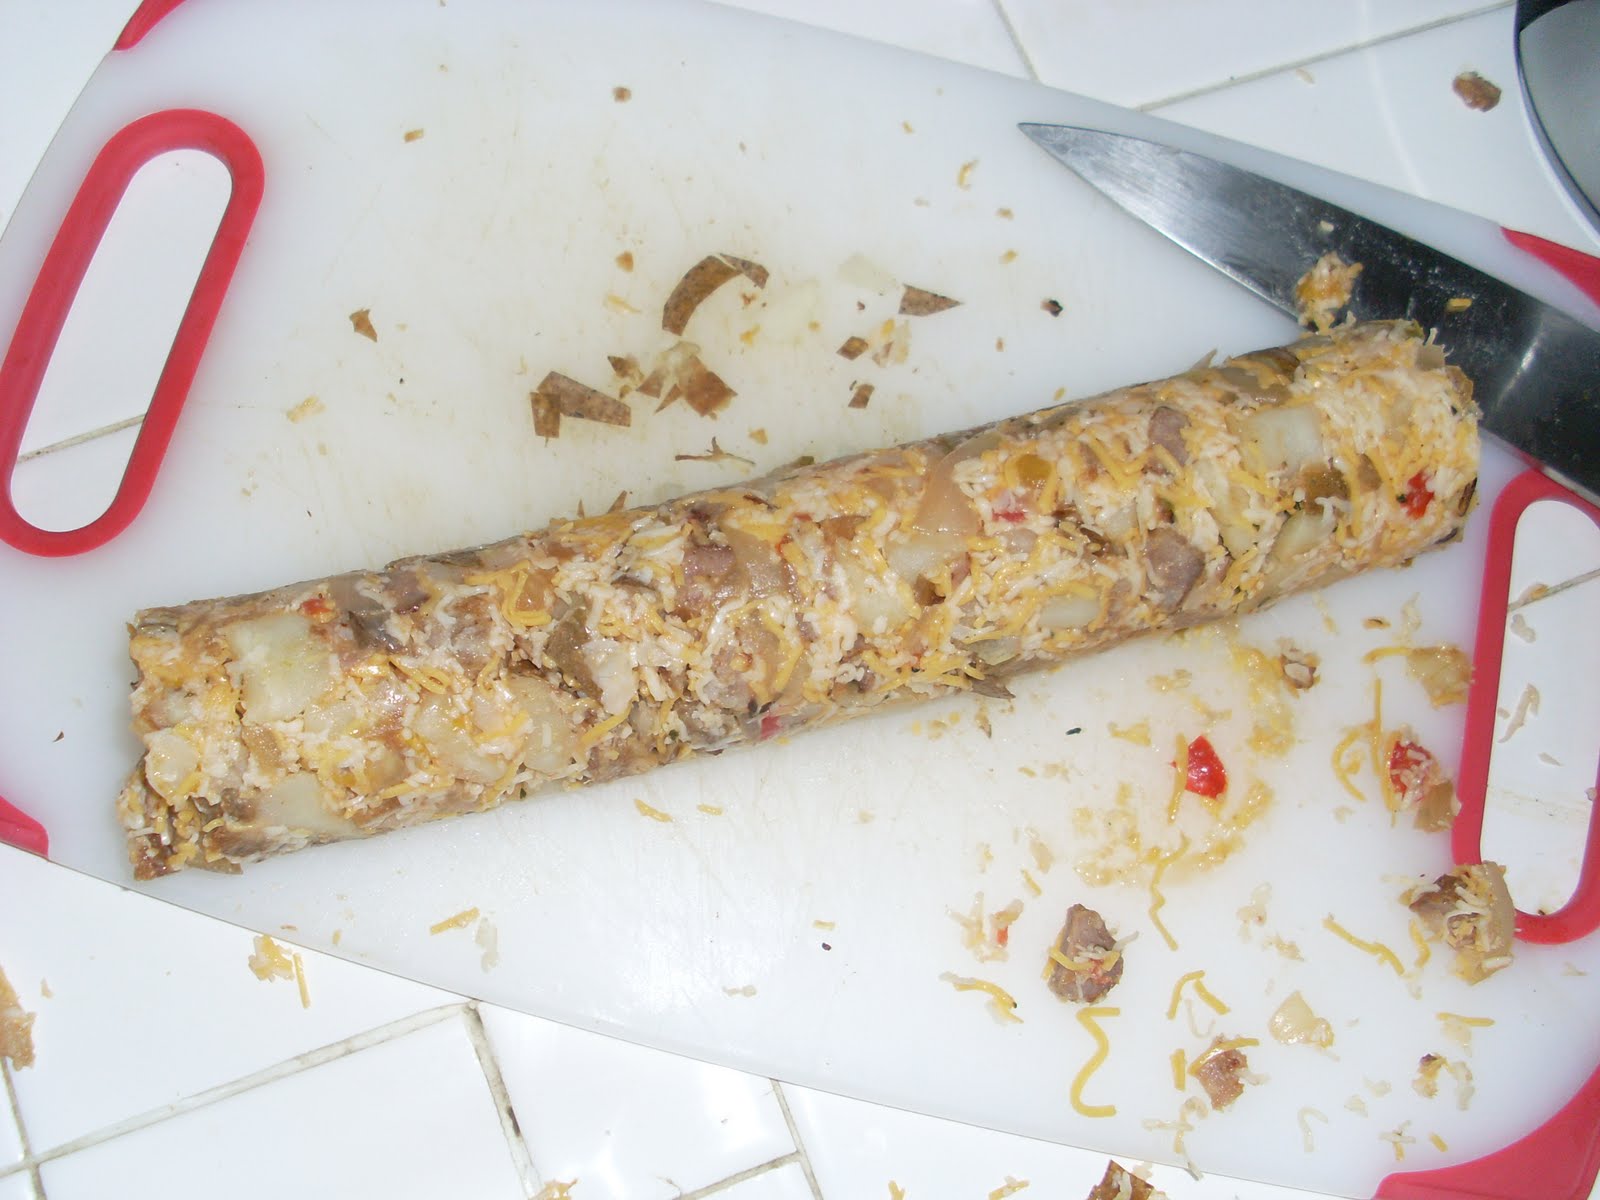
I jammed almost 2 1/2 cups of stuffing into the piston for the appropriate length of my fatty. This stuffing was diced baked potatoes, cheese, breakfast sausage and some mango salsa. I wouldn't recommend adding any liquids in the future. It made the log kind of loose and would hold together better without it.


The log fit just right into the fatty. It was compacted so much that if I needed to I probably could have trimmed some off the end without messing up the log.

Add some sauce on the sausage layer....

Roll your fatty up - remember - roll up the sausage layer first and THEN roll up the bacon weave around the sausage roll.

Tuesday, June 22, 2010

Que'n for Kids 2010 California State BBQ Competition

Let's get this party started!!

Que'n for Kids 2010 California State BBQ Competition - Orange County Fairgrounds, Costa Mesa, CA - June 12, 2010.
Meat, Inc BBQ Team just finished attending the OC BBQ Competition.
Team members for this competition were Aaron, Doug, Ryan and Strawberry. Also joining us were Ann and Dan - KCBS Certified Judges that cooked with us to check the box on their way to becoming MASTER JUDGES! Very impressive!
We also had some help from Mike and Wendy and some extra friends that dropped in!


Aaron singing Holy Diver to his meats so they could cook even better. Ann is in the background trying to remember the chorus (you can see his stripes so you know he's clean).


Mike and Doug prepping meats.


Doug and Mike tossing meats on the smoker.


The Meat, Inc, crew making the world famous ABT's (Atomic Buffalo Turds). We only made 20lbs of jalapenos. All sold out within 1 1/2 hours.


Dan and Doug checking on the Texas crutch. Looking good boys!


Strawberry manning the wet bar. Looking good with a shirt on finally.


Aaron explaining to Monkey (from Rancho Rocke BBQ) why we couldn't trade Strawberry for a 40oz of Mickeys until all the dishes were washed.


Mike - that's 2 tablespoons of CUMIN - sheesh!


Can Aaron be in charge for a minute?!?! Put your shirt on!


Aaron and Ann making turn in boxes. Such great fun. Ann needs to make our turn in boxes every time. Aaron sucks at it.


Aaron and Strawberry being interviewed by the Food Network about our History Of BBQ Display. Do you think this film has ANY chance making it to production? Me thinks not.


Mike and Ryan discussing Cumin.


Turn in Chicken - a VERY disappointing 48 / 57. Same recipe that we pulled a 2nd place at Stage Coach.


Ribs - an average 34 / 57. That pesky 6th bone killed us.


Pork Butt - 18 / 57 - not bad.


Brisket - 19 / 57 - Not bad.

We finished up 30 / 57 in the middle of the pack. If our chicken would have been scored higher, we would have had a top 20. What are you going to do?

Overall contest results found here:
http://www.cbbqa.org/wiki/index.php?title=Kristie%27s_Foundation_-_Orange_County_BBQ_Festival_2010


Vending was outstanding - the proceeds from the vending went to Kristie's Kids Foundation - a great cause - Meat, Inc. sold 1198 samples! We sold over 300lbs of meat in under 2 1/2 hours! The crowd really enjoyed the samples!

Here's a link to the foundation. Please visit - it is a GREAT cause!

http://www.kristies.org/


Wes taking a bite of award winning ribs!


Ryan and Doug pulling more meats for the crowd. Doug asked Ryan if he wanted front or back of the house and Ryan picked the "easy" one - back of the house. Ryan had to cook his a$$ off! I'm pretty sure he didn't get dehydrated though!


The line passes by the History of BBQ display.


Monkey shows his appreciation for Strawberry and the official "Mr. BBQ 2010" - Big Country.


A Meat, Inc. fan voting for crowd favorite. She voted 5 times. It's legal.


Strawberry was actually asked / volunteered by the team to announce the award ceremony. At least he's wearing a shirt!
Overall it was a very well run contest for a great cause. We had a great time but we were a bit disappointed in the overall results - particularly chicken. But what can you do? Get another beverage, cook some more meat, and try again next time!

Sunday, June 6, 2010

Cooking Tools - Oven Thermometer

Cooking Tools - Oven Thermometer

Typically, people rely on the temp gauge in their BBQ / Smoker hood. This is WRONG - do NOT do this! Get yourself at least two oven thermometers and put one at each back corner of the cooking grate.

Why?

A few reasons:
  1. The thermometer that came with your grill is probably low quality
  2. The temperature at the hood of your grill is probably different than the temp at the grate
  3. Your grill probably has a "hot side"
  4. You want to be able to cook based on the recipes and if you use your hood gauge, your recipe will not turn out like they're supposed to.
  5. Oven thermometers are inexpensive and will make you cook better!


Here is the gauge on a typical grill / smoker. It is low quality and was often over 100 degrees off from the grate temp. You cook at the grate - NOT at the hood.


Using an oven thermometer at the grate gives you an accurate picture of what the actual temperature you are cooking at - where the food is cooking.


Your food is cooking at the grate - NOT in the hood! The grate temperature can fluctuate from side to side, corner to corner of every BBQ. I have never seen a BBQ / Smoker that has even heat distribution - no matter what the reviews for that grill say.


When you follow a recipe or cook the same meal twice, you want consistency and accuracy. Knowing what the temperature is allows you to accomplish this!


Grate temperatures are NOT the same across the grill. You can see (if you zoom in) that even on this higher quality grill / smoker that there is a severe discrepancy in the grate temp. The far left back corner is at 175 F and the far right back corner is at 300 F. Not pictured is the hood gauge which was at 350 F and the digital temperature probe (thermocouple) which read 290 F. The difference in grate temp from left to right was over 120 F! This is really significant! Knowing how YOUR grill acts and where the "hot spots" are will allow you to fine tune your cooking technique and repeatably cook food better and more efficiently.

So - are you convinced? This is cheap right? RIGHT! I buy these oven gauges at Smart and Final for around $7.00 each. Get two - it will set you back $15 and it will look cool on your grill -making you look cool - particularly after you regurgitate this really important info. Here's a link (no affiliation to these companies - the first ones that showed up in a search):

http://www.chefsresource.com/proaccurate-oven-thermometer-cdn.html

http://www.amazon.com/MIU-90069-Commercial-Oven-Thermometer/dp/B000JO0AHU/ref=sr_1_1?ie=UTF8&s=home-garden&qid=1275882600&sr=8-1

Make sure that you purchase thermometers that have a temp range that goes down to 100F and not higher than 550 or 600 F so you have some accuracy in the sweet spot. You want the low range so when you are smoking - or using a gas grill with 1/2 turned off - you can try and hit the 200 F - 250 F zone and be able to determine that accurately.